-
 Streams
-
Compute
- Overview
- Group By Ranges & Buckets
- Data Explorer Guide
- Video Completion Funnel
- Saved Queries
- Compute Pricing Guide
- Custom Ad Performance
- Session Timing Metrics
- Cohort Analysis
- Retention Analysis
- Funnel Analysis
- Creating a Funnel with an OR Condition
- Stripe Revenue Queries
- Create a Email Nightly Report
- Query Tuning
- Cached Queries
- Cached Datasets
- Paid Session Metrics
- User Engagement
-
Visualize
Dashboard Management
Creating a new dashboard
Navigate to the “Dashboards” in the Keen app. To create a new dashboard click the “New Dashboard” button (1). You will be redirected to a newly created dashboard in edit mode. In edit mode, you can add, position, and resize widgets.
Editing a dashboard
Navigate to the “Dashboards in the Keen app. To open a dashboard in edit mode, click “Edit” (2) in the dashboard actions menu.
Editing dashboard info
Naming a dashboard
Each newly created dashboard will display “Untitled dashboard” as the name by default. To set the name of your dashboard, click the “Settings” button in the top right-hand corner in dashboard edit mode. Give the Dashboard a name and select “Save Changes”. You can also access the dashboard settings from the list view (3).
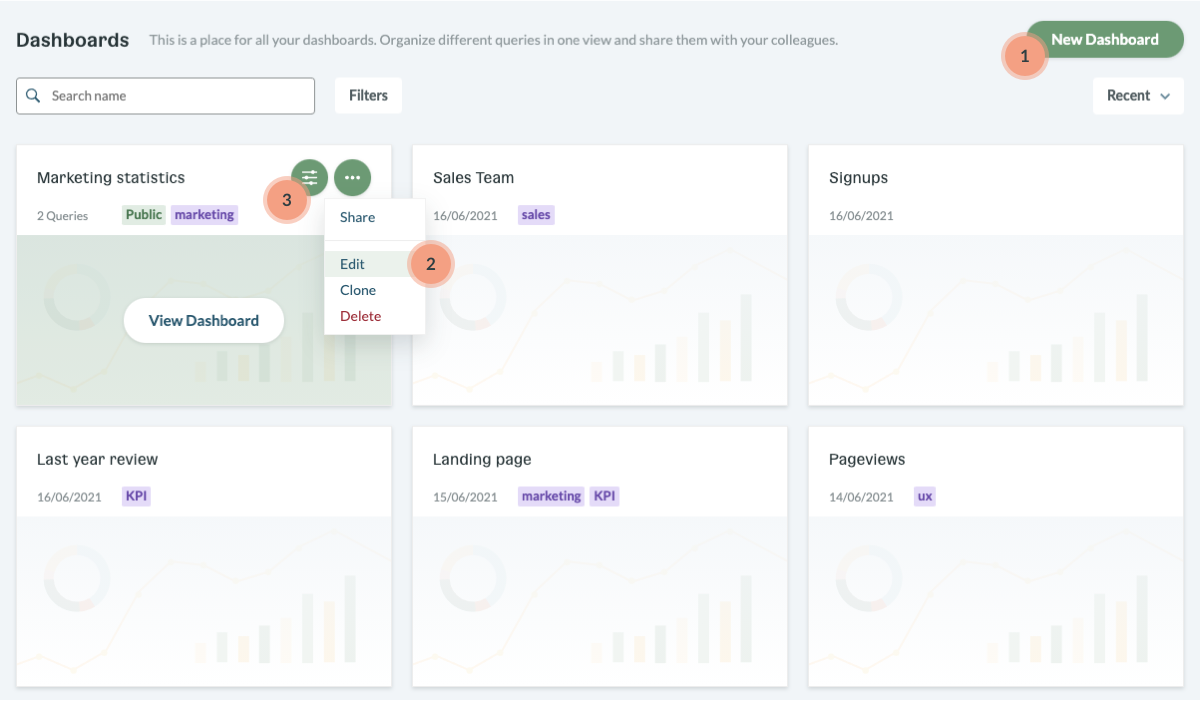 Dashboard management view with the single dashboard item hovered and the Actions menu expanded
Tagging a dashboard
In addition to naming your dashboard (4) in the dashboard settings modal, you can also create and add tags (5) for categorization. Tags enable you to provide context around the data presented in a dashboard and quickly filter down to the dashboards that are most relevant. We recommend adding a tag for your personal dashboards. This is a great way to stay organized when collaborating with your team.
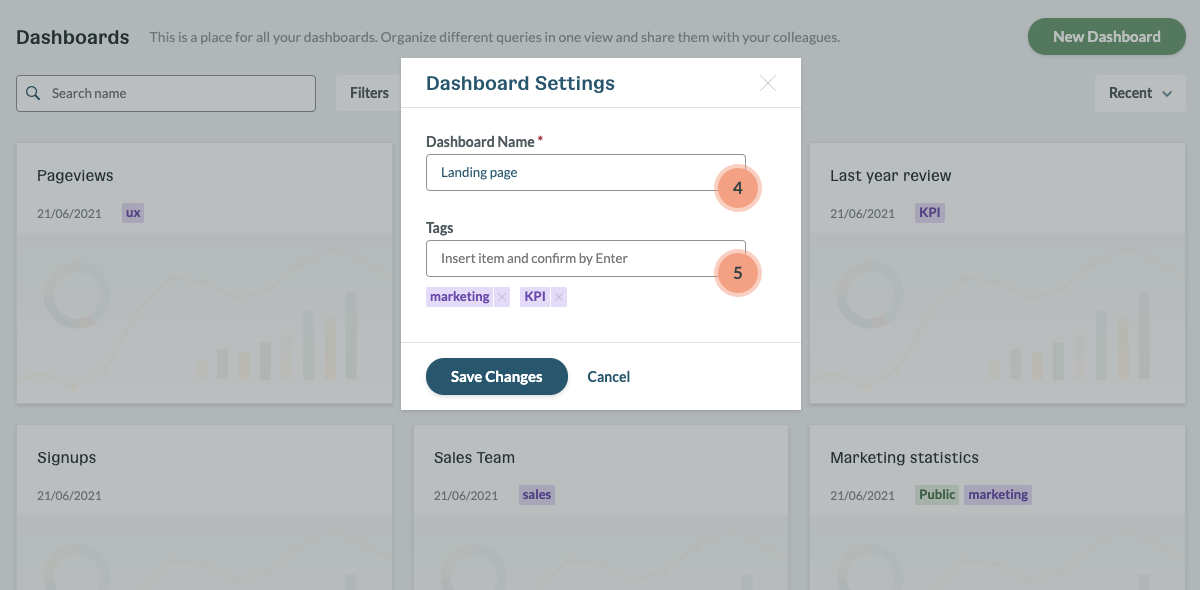 Dashboard settings modal
Cloning a dashboard
To increase the speed of creating new dashboards, you can easily clone an existing one and then apply all necessary changes. To clone a dashboard, click “Clone” (6) in the dashboard actions menu.
Deleting a dashboard
To delete a dashboard, click “Delete” (7) in the dashboard actions menu. The dashboard actions menu can be opened from the dashboard list view and from the specific dashboard view.
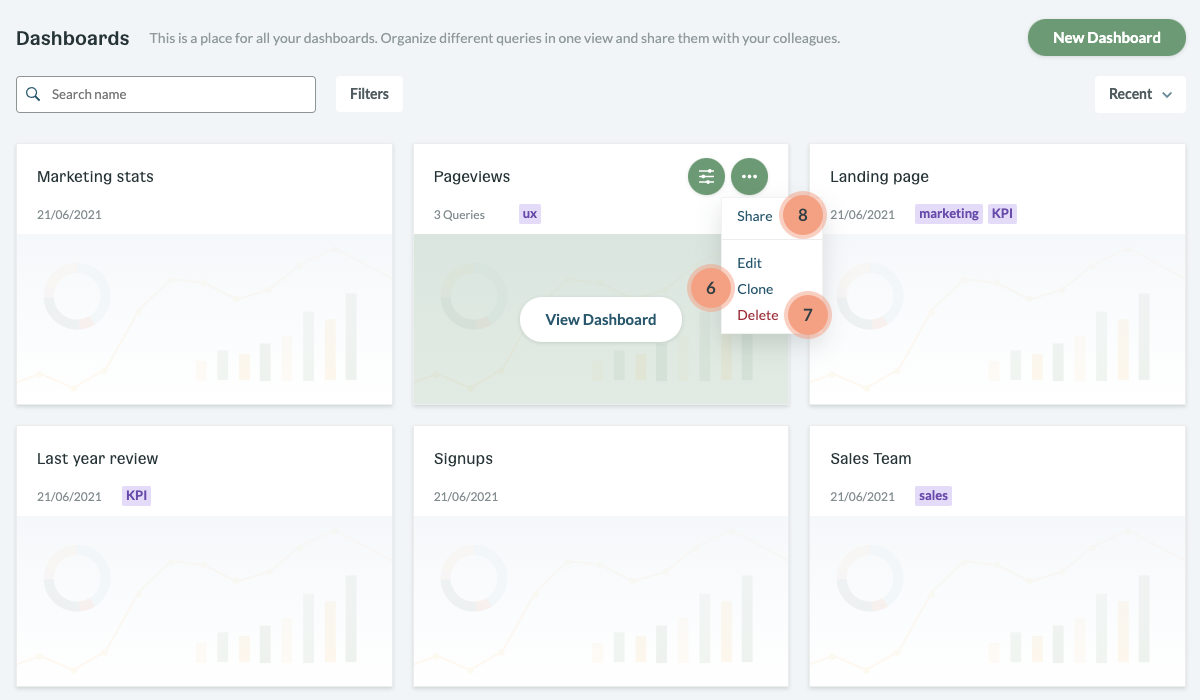 Dashboard item actions menu
Sharing a dashboard
Public Link
After a dashboard is created, it can be shared with internal and external users. First, you will need to make the dashboard public by clicking the “Share” in the actions menu (8). Share settings can also be accessed from the specific dashboard page.
In the share settings modal, switch the toggle (9) to “ON” to make the dashboard public. Each public dashboard uses its own generated access key. To make the dashboard private again just switch the toggle back to “OFF”.
You can also regenerate a public link by clicking the “Regenerate Link” label (10). This action will remove the old access key connected with the dashboard and create a new one.
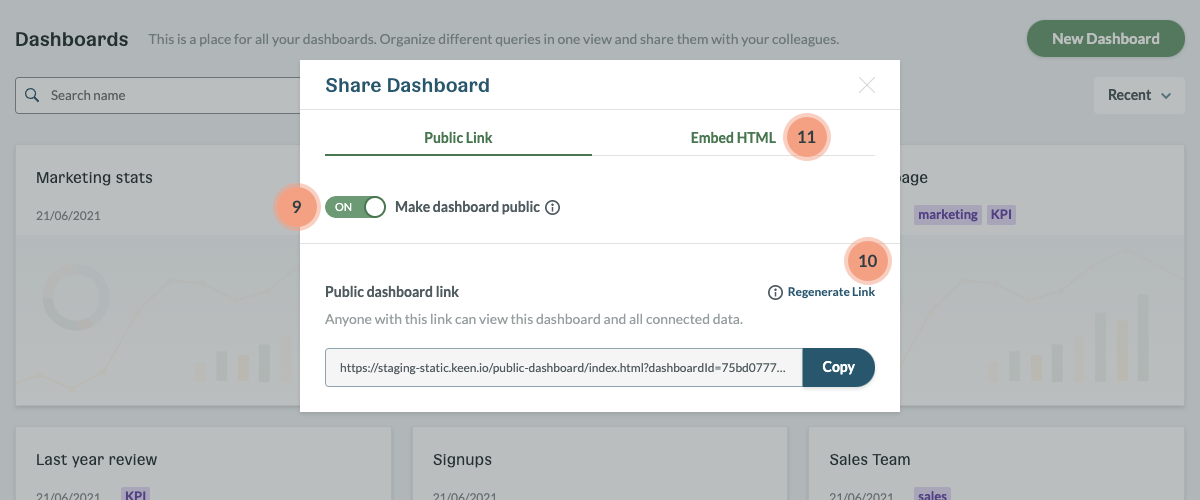 Dashboard share settings modal
Embed HTML
Dashboards can also be shared by embedding (11). We recommend using the code snippet on web pages that have to be accessed with login credentials.
