-
 Streams
-
Compute
- Overview
- Group By Ranges & Buckets
- Data Explorer Guide
- Video Completion Funnel
- Saved Queries
- Compute Pricing Guide
- Custom Ad Performance
- Session Timing Metrics
- Cohort Analysis
- Retention Analysis
- Funnel Analysis
- Creating a Funnel with an OR Condition
- Stripe Revenue Queries
- Create a Email Nightly Report
- Query Tuning
- Cached Queries
- Cached Datasets
- Paid Session Metrics
- User Engagement
-
Visualize
Airbyte Integration
Stream data from hundreds of sources to Keen for analysis and charting
Introduction
Airbyte.io is an open-source data integration platform that gives your infrastructure superpowers to collect and move data seamlessly, whatever the tools you use. With the Airbyte and Keen integration, you can easily send data from 100+ platforms to Keen for unified analytics and dashboarding.
Gone are the days of shuffling between platforms and aggregating data. Your marketing, sales, product, and customer success teams will finally have a single view to fully understand the impact they are having. Plus, they can use this data to make strategic, data-backed optimizations to improve customer experience and accelerate growth.
This guide covers:
- Setting up Airbyte
- Setting up Keen Destination Connector
- Replicating Data from Stripe to Keen
- Wrapping up
- Additional Resources
Setting up Airbyte
Prerequisites
Airbyte
First, clone the Airbyte repository.
git clone https://github.com/airbytehq/airbyte.git
Docker
Install docker and docker compose.
Launching Airbyte
Once the Airbyte repository is cloned, navigate to its directory.
cd airbyte
And spin up the application.
docker-compose up
That’s it! Now that Airbyte is up and running, you are ready to set up the Keen Destination Connector.
Setting up Keen Destination Connector
First, visit http://localhost:8000
If it’s the first time you’re launching Airbyte, you’ll need to customize your preferences. Then, you’ll be offered a quick onboarding for the application. You can complete the walkthrough or skip it and continue with the following steps.
Navigate to the Destinations tab and create a new Keen Destination Connector.
Now, it’s time to set up your connector.
In the Keen application, navigate to your project’s Access tab. You will need to copy your Project ID and Master API Key. Then, paste this information into the connector configuration in the Airbyte application. Don’t forget to give your connector a name!
Note: By default, the Keen connector will infer the *keen.timestamp field based on the data from the event that occurred in the source application. This ensures the most accurate analytics for time-related data. If Keen cannot infer the timestamp, or you have chosen to disable this functionality, keen.timestamp will hold the value of time when the record was saved in Keen.*
That’s it!
Now, you’re ready to connect Keen with the source of your choice.
Replicating data from Stripe to Keen
Let’s test the connector with Stripe, a payment processing platform, as the data source.
First, create a Stripe Source Connector
Fill in the details required by the Stripe Source Connector:
- Stripe account id. Find yours here
- Stripe client secret. Find yours here
- Start date - records newer than specified, will be replicated to the destination.
You can find more details about Stripe connector here
Now, you are ready to set up the connection between Stripe and Keen.
First, simply create the connection.
Then, set up connection configuration. Here you can choose:
- Synchronization frequency - sets how often you want to stream data to Keen
- Table prefix - collection names at Keen will be prefixed with specified name. For this example we’ll use ‘stripe-’
- Normalization - not supported by the Keen Connector and specifying it will have no effect
- Streams which you want to replicate into Keen
The Keen destination supports 3 synchronization modes. You can specify the mode for each stream:
- Full Refresh - Overwrite: This mode replaces all the old data in Keen collection
- Full Refresh - Append: This mode fetches all the data from source every time and appends it to existing collection
- Incremental Sync - Append: This mode adds only new, or modified records for each synchronization. At first run, it works the same as a Full Refresh, but each next run, only records that were not present before will be fetched
Note: Not all streams support all synchronization modes.
For more information regarding connection configuration, check airbyte documentation.
Now, you can run the synchronization. All the selected streams will be replicated into separate collections at Keen.
Soon, you will see records start to appear in your project at Keen.
Analyze your Stripe Data Using Keen
Once your data is replicated to Keen, it’s now time to create a query to uncover actionable insights. For example, let’s say you are on a Finance and Accounting team and are interested in the amount you charged each of your customers, so that you can reconcile your payments.
To get this information, you can create a query with the following parameters:
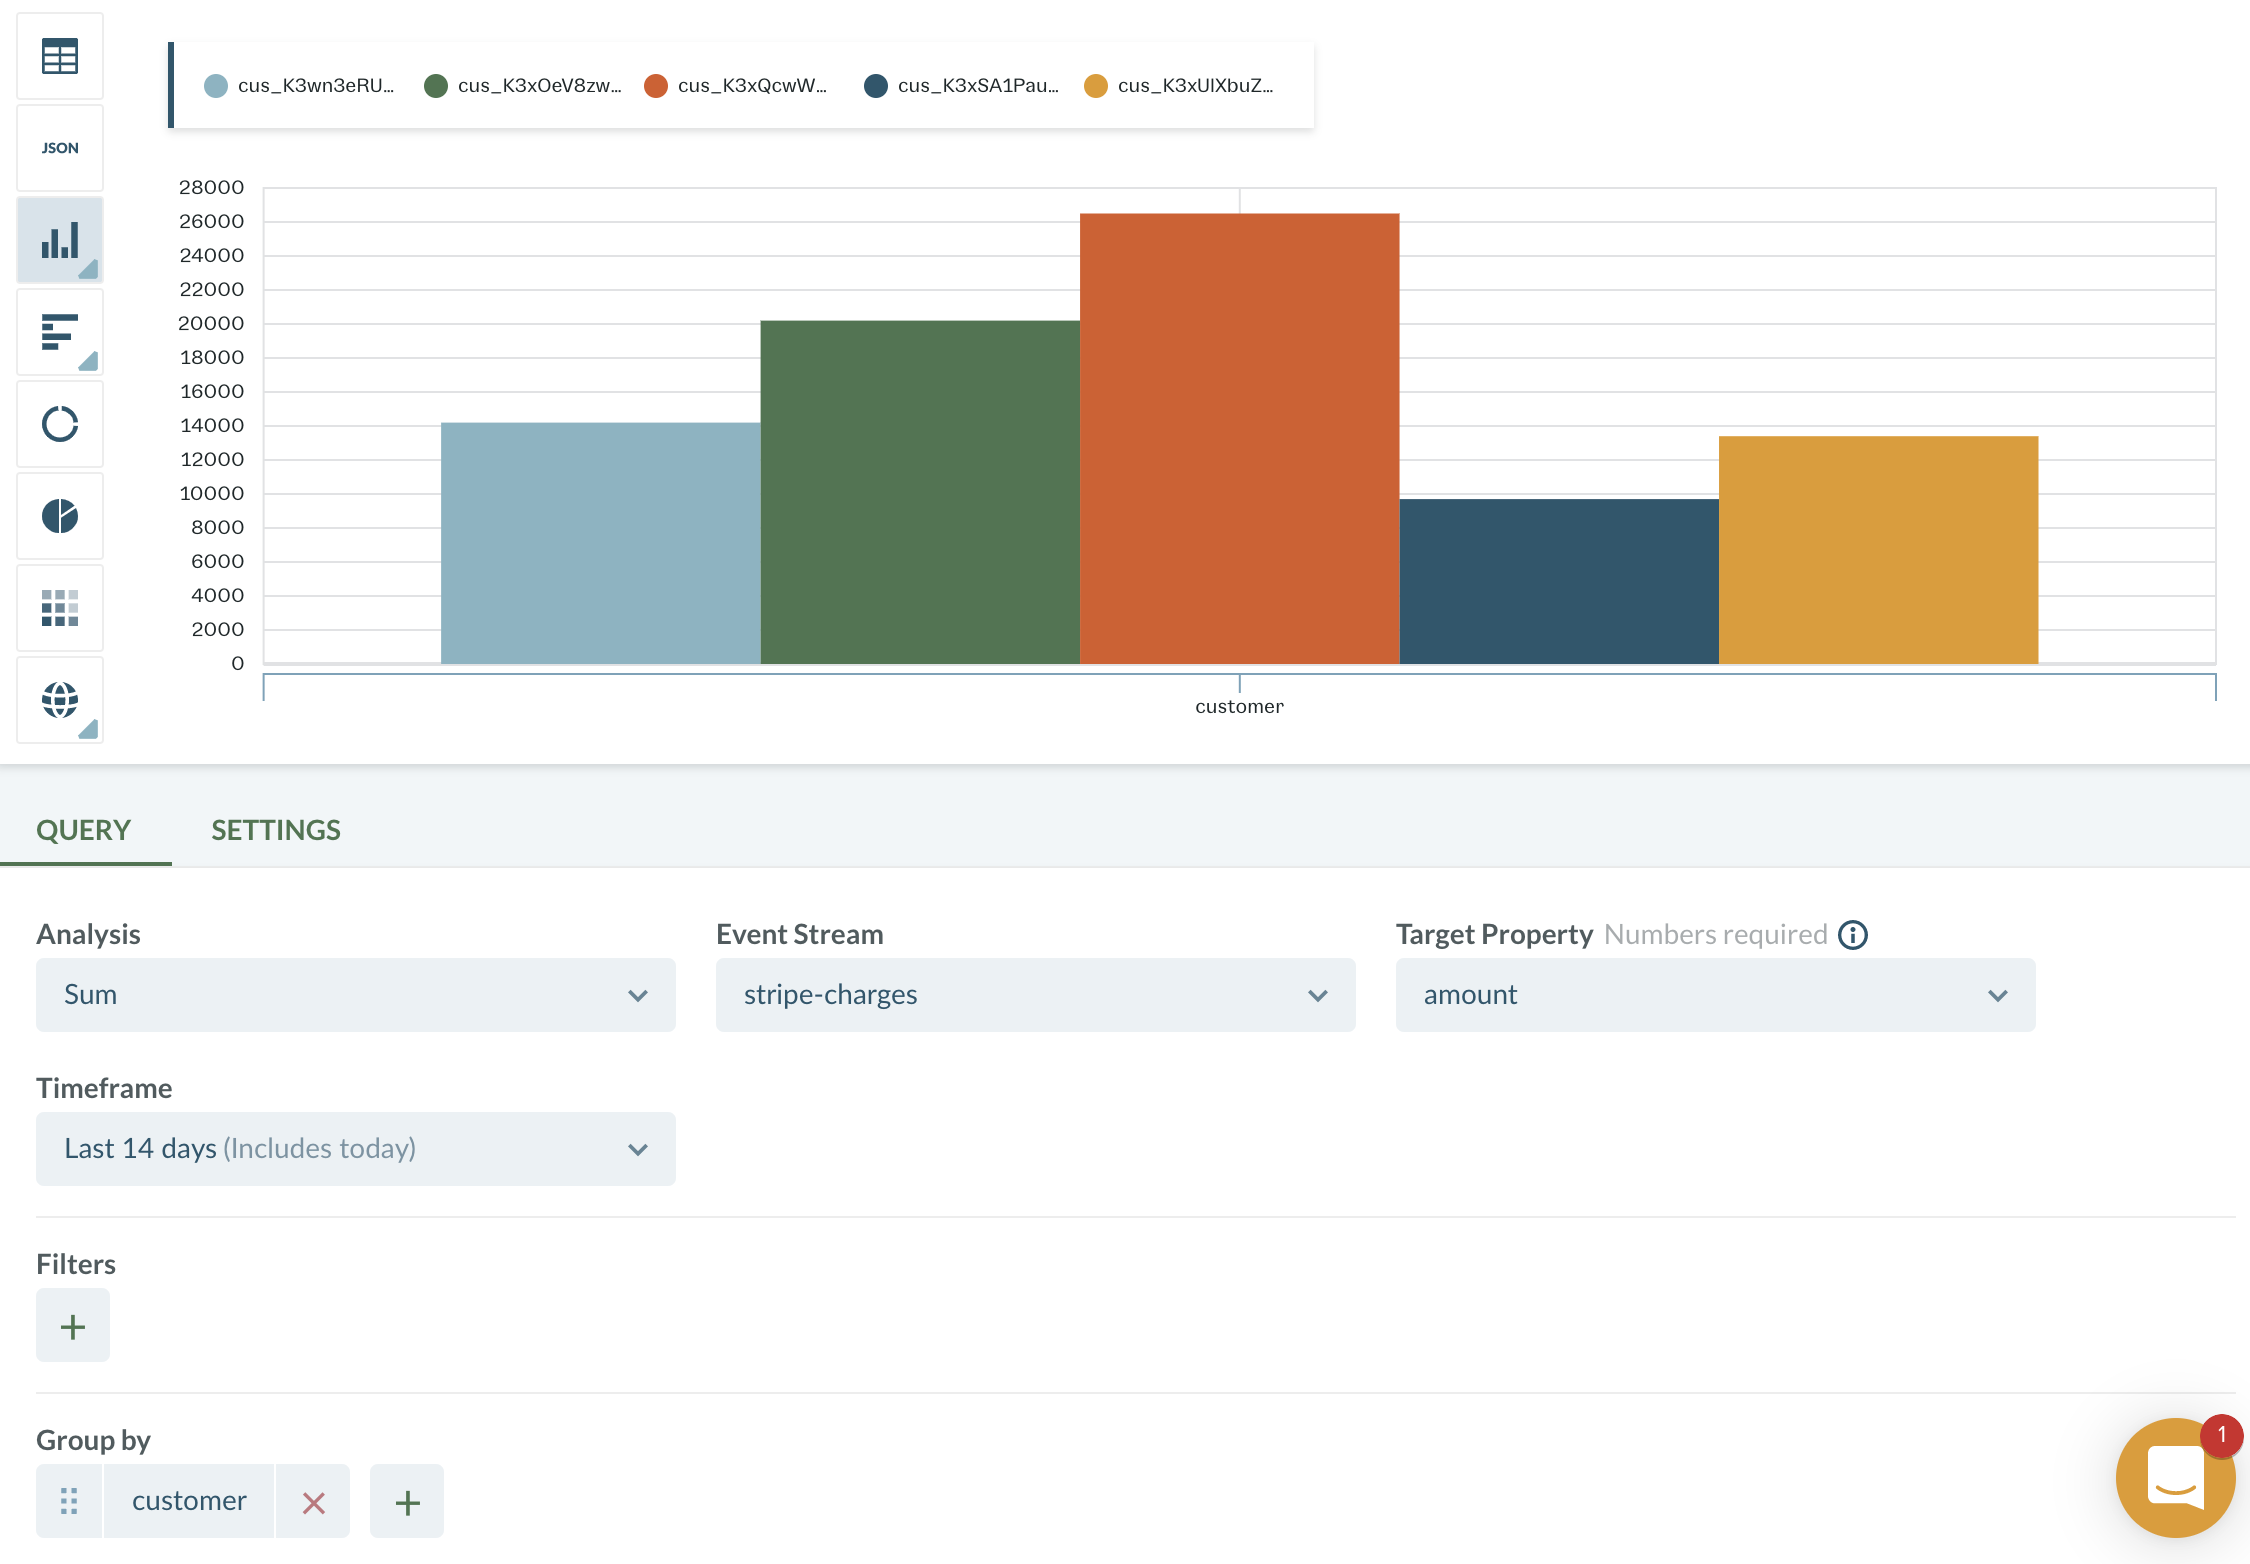
Queries can be easily saved and then added to a dashboard. That way, all of the insights you need are conveniently located in a single place.
Wrapping up
To summarize, here is what we’ve done during this recipe:
- Set up Airbyte
- Set up Keen Destination
- Replicated data from Stripe
- Analyzed your Stripe data with Keen
To get started with the Keen + Airbyte integration, head over to Airbyte.io and reach out to us at team@keen.io if you have any questions.
