We’ve heard the clamoring and finally we’re proud to announce that we have an Arduino library to send events to Keen IO! If you want to check out the code, its all open sourced here.
To get the creative ideas flowing, I started a sample project using this library to create a dashboard that tracks motion detection from a PIR sensor. The full code for the dashboard and Arduino snippet live here.
Activity Tracker
What are we building?
Have you ever wondered how active you are throughout the day, or if your cats are running around all over your desk at night? I have! What we will build here is a motion sensor hooked up to an Arduino Yún board that sends event data to Keen so we can display it on a nice dashboard.
Components Used
- Arduino Yún board
- PIR motion sensor
- some jumper cables
- a Keen IO account
Setting up the Arduino Example
So, Keen IO requires SSL to work, and currently, the Yún is the only Arduino board that supports it. And, to make things even more fun, you have to do a little work with security certs to make it work. There’s a nice write-up on how to do that here.
Once the Yún is configured with the new certificate, it’s time to run the example code to make sure you can send events to Keen IO. One small caveat to the built-in example, since I am programming the board over wifi, I had to use Console instead of Serial to see debug output.
#include {Bridge.h}
#include {ApiClient.h}
#include {KeenClient.h}
#include {Console.h}

KeenClient keen;

void setup() {
  pinMode(13, OUTPUT);
  digitalWrite(13, LOW);
  Console.begin();
  digitalWrite(13, HIGH);

  Serial.begin();

  while (!Console);
  Console.println("Started!");
}

void loop() {
  keen.setApiVersion(F("3.0"));
  keen.setProjectId(F("YOUR_PROJECT_ID"));
  keen.setWriteKey(F("YOUR_WRITE_KEY"));

  keen.addEvent("motion_detections", "{\"cat\": 1}");
  keen.printRequest();

  while (keen.available()) {
    char c = keen.read();
    Console.print(c);
  }

  Console.println();
  Console.flush();

  delay(2000);
}
This code will boot up on the Yún, and then send an event to the motion_detections collection associated to your Keen account. If you’re programming it through the USB cable, the Serial object will be what you want to see debug output.
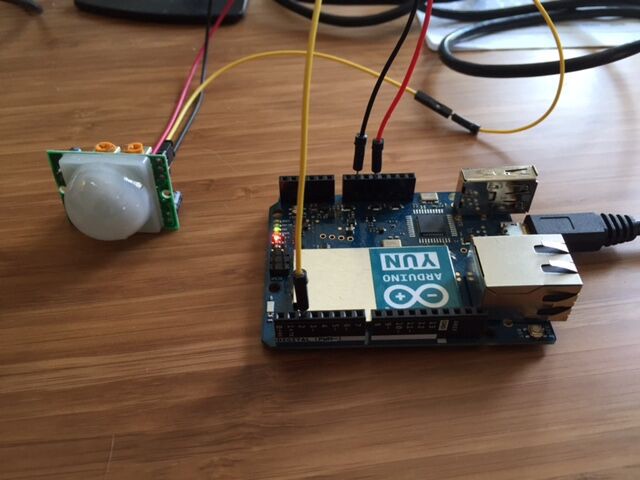
Tracking Motion
Before we write more code, we have to hook up the PIR sensor to the Arduino.
Now, what we really want is to track motion, but there are a few things we have to figure out to do that. First, we have to be able to parse the date and time, which isn’t very straightforward. I found this helpful example, which I then modified to parse out the pieces of a date and time that I would need for my data model.
//if there's a result from the date process, parse it:
while (date.available() > 0) {
  // get the result of the date process (should be day:month:year:day of week:hour:minute:second):
  String timeString = date.readString();

  // find the colons:
  int dayColon = timeString.indexOf(":");
  int monthColon = timeString.indexOf(":", dayColon + 1);
  int yearColon = timeString.indexOf(":", monthColon + 1);
  int dayOfWeekColon = timeString.indexOf(":", yearColon + 1);
  int hourColon = timeString.indexOf(":", dayOfWeekColon + 1);
  int minuteColon = timeString.indexOf(":", hourColon + 1);
  int secondColon = timeString.indexOf(":", minuteColon + 1);
  int nanoColon = timeString.lastIndexOf(":");

  // get the substrings for hour, minute second:
  String dayString = timeString.substring(0, dayColon);
  String monthString = timeString.substring(dayColon+1, monthColon);
  String dayOfWeekString = timeString.substring(yearColon+1, dayOfWeekColon);
  String hourString = timeString.substring(dayOfWeekColon+1, hourColon);
  String minuteString = timeString.substring(hourColon+1, minuteColon);
  String secondString = timeString.substring(minuteColon+1, nanoColon);
  String nanoString = timeString.substring(nanoColon+1);

  // convert to ints, saving the previous second:
  // int year, month, month_day, day_of_week, hours, minutes, seconds;
  month_day = dayString.toInt();
  month = monthString.toInt();
  day_of_week = dayOfWeekString.toInt();
  hours = hourString.toInt();
  minutes = minuteString.toInt();
  lastSecond = seconds;
  seconds = secondString.toInt();
  nano = nanoString.toInt();

  // Need to make sure we don't send an erroneous first motion event.
  if (lastHour == -1) {
    lastHour = hours;
  }
}
There’s a lot of nasty boilerplate code in that snippet, but this lets us track the different numbers we need to look at things like active seconds per day, hour, month, etc.
Next, we want to add some logic to the main loop to detect when the PIR sensor picks up motion:
void loop() {
if (pirVal == HIGH) {
if (pirState == LOW) {
digitalWrite(13, HIGH); // LED ON to show we see motion.
Console.println("Motion detected!");
pirState = HIGH;
lastActivity = nano;
keen.addEvent("motion_detections", "{\"motion_state\": \"start\"}");
keen.printRequest();
while (keen.available()) {
char c = keen.read();
Console.print(String(c));
}
Console.println();
}
} else {
if (pirState == HIGH) {
Console.println("Motion stopped!");
pirState = LOW;
digitalWrite(13, LOW);
keen.addEvent("motion_detections", "{\"motion_state\": \"stop\"}");
while (keen.available()) {
char c = keen.read();
Console.print(String(c));
}
Console.println();
}
}
Console.flush();
// poll every second
delay(1000);
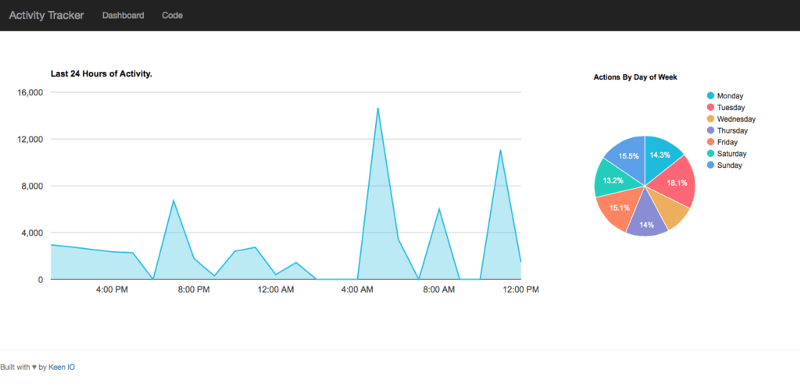
}Setting up the Dashboard
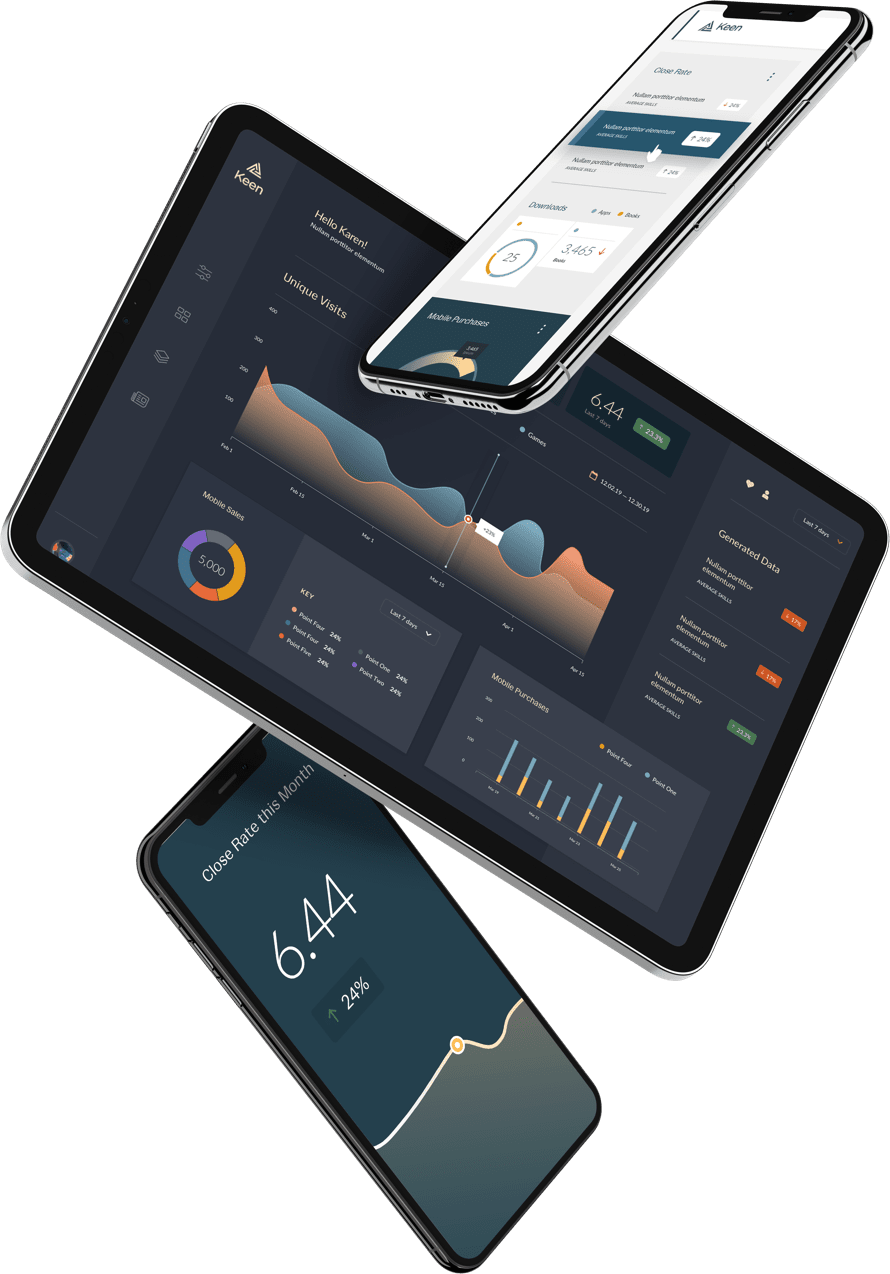
I wanted to set up a quick dashboard to track motion, so I took our hero-thirds dashboard starter, and loaded that into an emberjs project (I wanted to learn ember as well). You can see a live demo here.
I played around in the Data Explorer until I found the visualizations I wanted, then added them to the page. The final version of the Arduino code is also available to view.
So with a few simple lines of code and a quick dashboard, you can start tracking some interesting data with your Arduinos on Keen IO!
Have ideas for a project or want to hack around on your Arduinos? Come chat with me in our Slack channel!