David Cook from Jut recently guest-wrote an awesome post on Segment’s blog about the benefits of creating “information radiators” to help quickly share information using visual cues and displays. In the post, he talked about how Jut built one of these radiators using Segment, Keen, and some LED lights. We thought this was so cool that we asked him to put together a more technical how-to guide for those of you who want to try this out for yourselves. Check it out!
First, What Is An Information Radiator?
Now that companies are collecting tons of data on what users are doing in their products (you are collecting user data, aren’t you?), the challenge shifts from figuring out what users are doing, to disseminating that information to the company. If you really want to be a data-driven organization, you have to make data accessible to everyone at all times. Enter the information radiator.
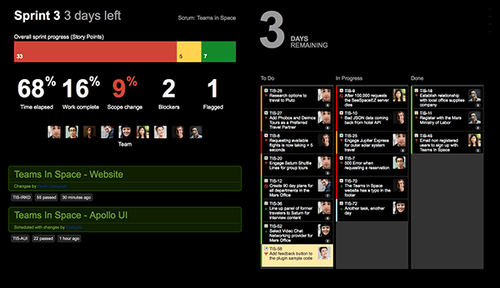
The most common information radiator is a wallboard — a TV that constantly displays information. However, humans have a natural instinct to tune out things that aren’t relevant. This is why it’s valuable to take advantage of alternate means of constantly communicating information to your team. My data communication tool of choice is an installation of LEDs.
Ok, So, What’s So Great About LEDs?
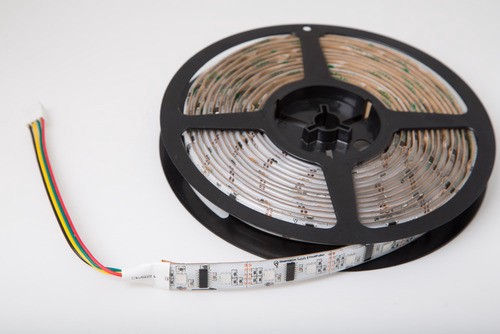
LEDs add depth to your data visualization arsenal. They’re more engaging than a wallboard because they’re unusual. You can configure LEDs into a variety of shapes: individual pixels, pixels arranged into a matrix, or a strip of LEDs strung together. We use LED strips because they’re easier to setup and allow you to construct a larger installation that more people are likely to see. Specifically, we use Heroic Robotics’ LED strips and control them with the PixelPusher. This combination simplifies the act of controlling individual LEDs on the strip.
How to Display User Actions with LEDs!
Start Capturing Data
While you should track everything your users do, it’s best to measure and display the moments where users derive value from your product so your team can strive to make more of those moments occur.
At Jut, the main way our users derive value from our product is by writing and running programs in our new language, Juttle, that retrieve and display data. We fire an event whenever a user does this, so we decided to send a pulse of light down an LED strip for each of these events. We use Segment to send those events to Keen.
Retrieve the Data from Keen
We’ve written a java program that runs on a server in our closet and pings Keen to get new data and displays that data on the LEDs. You can find the code here, but we’ll explain some of it below:
Every minute, we use Keen’s API to request the timestamps and status of all the Juttle programs run in the last minute. (We used Keen’s workbench to generate the URL that we hit via the API.) The java code looks like this and should be used in a thread that runs once a minute:
URL event_one = new URL("https://api.keen.io/3.0/projects/");

StringBuffer response = new StringBuffer();

try {

    HttpURLConnection con = (HttpURLConnection) url.openConnection();

    con.setRequestMethod("GET");

    BufferedReader in = new BufferedReader(new InputStreamReader(con.getInputStream()));

    String inputLine;

    while ((inputLine = in.readLine()) != null) {

        response.append(inputLine);

    }

    in.close();

} catch (ProtocolException e) {

    e.printStackTrace();

} catch (IOException e) {

    e.printStackTrace();

}

ArrayList eventList = new ArrayList();

eventList.add(response);
Once this code runs, you have to parse the results of the Keen API call. How exactly you parse the response depends on the information Keen stores for you, so I’ll leave that up to you. However, you’ll definitely want to extract a timestamp and add a minute to it, to make it possible to play back the last minute of events at the same pace, instead of sending a bunch of pulses for each event at once.
That means, if you go to our website and run a Juttle program, one minute later a green pulse will shoot down the LED strip in our office like this:
Here’s an example of how to do this in java:
JSONArray events = new JSONObject(eventList.get(r).toString()).getJSONArray("result");

for (int x = 0; x < events(); x++) {

    String timestring = ((JSONObject)) events(x).get("keen")).getString("timestamp");

    String time = timestring.split("T")[1];

    int minute = Integer.parseInt(time.split(":")[1]) + 1;

}
Now that you know when to send the LED pulses, you just need to send them.
Configure the LEDs
To communicate with the LEDs, you need to use some of the methods that the PixelPusher team has provided:
if (testObserver.hasStrips) {

    registry.startPushing();

    registry.setAutoThrottle(true);

    registry.setAntiLog(true);

    List strips = registry.getStrips();

}
Once you have the strip, you can tell it what to do. We use a series of comparisons with the current system time to determine when to send a pulse:
long eventTime = eventList.get(x).getTimestring().getTimeInMillis();

// If the adjusted time of the event hasn't happened yet, then we haven't sent a pulse yet

if (eventTime > System.currentTimeMillis()) {

    // While the time of the event is greater than the current time, wait and keep checking to see if the time of the event ~= the current time

    while (eventTime > System.currentTimeMillis()) {

        // If the eventTime is within 10 milliseconds of system time, that's close enough, so send the pulse

        // As soon as we start the pulse thread, we move on to the next event in the list to avoid sending multiple pulses for the same event

        if (eventTime - System.currentTimeMillis() <= 10) {

            pulseThread = new LEDPulse(pulseStrip, 0xffffff, 10);

            pulseThread.start();

        }
    }
}
The pulseThread class is what actually controls the turning off and on of the LEDs to make it look like a pulse of colored light is traveling down the strip. You can control the color and speed of the pulse which gives you plenty of flexibility to display all kinds of events on one LED strip. It’s pretty simple:
import devices.pixelpusher.Strip;

public class LEDPulse extends Thread {

    private Strip strip;

    private int color;

    private int speed;


    public LEDPulse(Strip strip, int color, int speed) {

        this.strip = strip;

        this.color = color;

        this.speed = speed;

    }


    public void run() {

        try {

            for (int stripx = 0; stripx < strip.getLength(); stripx++) {

                strip.setPixel(color, stripx);

                if (stripx > 2) { // Once the pulse is 3 LEDs long, start turning the LEDs off behind the pulse

                    strip.setPixel(0, stripx - 3);

                }

                sleep(speed);

            }

            // After the pulse has gone up the whole strip, make sure the last LEDs are off.

            for (int stripx = strip.getLength() - 4; stripx < strip.getLength(); stripx++) {

                strip.setPixel(0, stripx);

            }

        } catch (InterruptedException e) {

            System.err.println("pulse interrupted");

        };

    }

}
Those are the key bits of the program; to see all of the code, check out the repo.
All in all, information radiators like these create a more lively atmosphere in the office. We can easily see how active our users are in almost realtime. If it seems like we’re experiencing an unusual amount of traffic, we can turn to our wallboard to see how the current level compares to historical levels.
What else do you think you could use LEDs for? Let us know on Twitter @jut_inc.